


Vegetable Preserves in an Autoclave
Proper vegetable canning preserves most of their beneficial nutrients and turns preserves into inexpensive and complete sources of vitamins as well as minerals. There are many more of these components in vegetables than in fruits. Home canning of vegetables in an autoclave allows you to make the preservation process quick and with minimal effort—and this applies to almost the entire range of products.
Taking professional classification into account, a home autoclave can be used to prepare natural, appetizer, and luncheon preserves, vegetable juices and marinades, and tomato-based products. Natural preserves are those prepared from one or more vegetables with sugar, salt, and acids, filled with water and sterilized. Appetizer preserves are vegetable products to which vegetable oil, spices, tomato juice, and herbs have been added. They most often undergo preliminary processing before canning and turn out to be more caloric.
Corn, cauliflower, tomatoes, carrots, peas, some types of greens, and many other canned vegetables belong to the category of natural preserves.
Rules for Canning Vegetables in an Autoclave
Vegetables in an autoclave are prepared, in most cases, following this algorithm:
- Selection of vegetables—ripe, without rot or other defects.
- Processing—washing, sorting, peeling, slicing, boiling, or other preliminary heat treatment (if necessary).
- Placing aromatic and spicy ingredients on the bottom of clean jars according to the recipe.
- Adding vegetables (almost always done without tamping).
- Preparing the brine. This usually requires hot water (about 80 degrees Celsius) with salt, sugar, and vinegar.
- Adding the hot brine to the jars. It is important to leave about 2 cm to the lid—during sterilization the contents will expand and need space.
- Sealing the jars with metal lids.
- Sterilizing the jars in the autoclave under certain temperature and pressure conditions.
- Removing the jars after the autoclave has cooled.
If the thermometer is located in the upper part of the vessel:
| Name | Jar, L | Temperature, °C | Duration, min |
|---|---|---|---|
| Summer salad | 0.5 | 95 | 5 |
| 1 | |||
| Eggplant caviar | 0.5 | 100 | 15 |
| 1 | |||
| Pickled cucumbers | 1 | 80 | 5 |
| 3 | 10 | ||
| Pickled tomatoes | 1 | 100 | 5 |
| 3 | 15 |
If the thermometer is located in the lower part of the vessel:
| Name | Jar, L | Temperature, °C | Duration, min |
|---|---|---|---|
| Summer salad | 0.5 | 105 | 5 |
| 1 | |||
| Eggplant caviar | 0.5 | 110 | 15 |
| 1 | |||
| Pickled cucumbers | 1 | 90 | 5 |
| 3 | 10 | ||
| Pickled tomatoes | 1 | 110 | 5 |
| 3 | 15 |
Vegetable preserves (containers from 300 g to 1 liter) are sterilized at 90° - 110°C for about 5–20 minutes. And pickled mushrooms with the same jar volume—at 110°C for about 10 minutes.
To keep vegetables stored for a long time without spoiling, they should be kept in a room with a temperature from -2 to +15°C. And the humidity in the room should not exceed 95%.
General sterilization standards for canned vegetables in an autoclave:
| Jar volume, L | Sterilization temperature, degrees Celsius |
Sterilization duration, min |
|---|---|---|
| 0.35 | see the temperature regime table above |
10 |
| 0.50 | see the temperature regime table above |
15 |
| 1.00 | see the temperature regime table above |
20 |
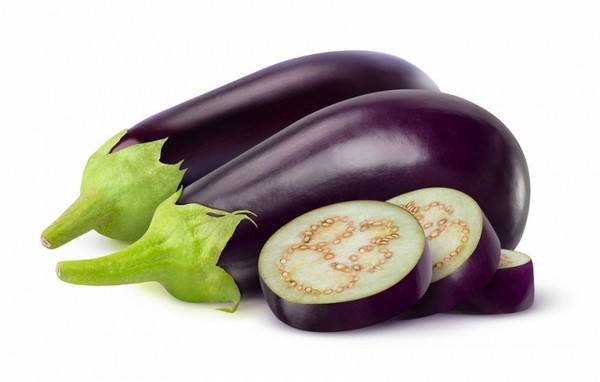
Recipe for Canned Eggplants in an Autoclave
These classic vegetable preserves in an autoclave are prepared with the following ingredients:
- eggplants – 3 kg;
- sweet pepper – 2 kg;
- tomatoes – 1 kg;
- onion – 500 g;
- carrot – 1 kg;
- sunflower oil – 1.5 cups;
- salt – 2 tbsp.
The best for the recipe are early eggplants (they have fewer seeds). They should be cut into circles, salted, and left in a pot for 3 hours to release juice. During this time, cut the other vegetables: grate the carrot, cut the onion and pepper into rings, and the tomatoes into quarters. Each ingredient should be fried separately in sunflower oil, and only then mixed. Put the eggplants into clean jars, then a layer of vegetables, and fill to the top in layers. Sterilization time in the autoclave—up to 15 minutes.
Canned Tomatoes in an Autoclave

Vegetable canning in an autoclave in their own juice is common—for example, to prepare tomatoes you need:
- medium-sized tomatoes – 12 pcs.;
- freshly squeezed tomato juice – 1 cup;
- black pepper – 4–5 peppercorns;
- salt – 1 tsp.
Wash the tomatoes and keep them in boiling water for 30 seconds to remove the skins. Put pepper and salt into the jars, very carefully place the tomatoes (do not squeeze them under any circumstances!), heat the tomato juice to about 80 degrees Celsius and pour it into the jars. Then the containers can be hermetically sealed with metal lids. Closed jars should be placed in the autoclave and sterilized for 15 minutes for 3 L jars and 5 minutes for 1 L jars. The finished product stores perfectly and is universal: it can be consumed as is or used as a component of dishes (for example, pizza).
Recipe for Canning Cucumbers in an Autoclave

You can also make autoclave preserves for winter from cucumbers. In this recipe we consider preparing crunchy pickled fruits. You will need:
- medium-sized cucumbers;
- salt – 5 g per 0.5 L jar;
- garlic cloves – 3–4 pcs.;
- fresh dill;
- black pepper – 0.5 tsp.;
- vinegar – 1 tsp.;
- water.
Select proportions depending on the jar volume used. Add spices to taste. Choose firm cucumbers for canning. Ideally, they should be harvested no later than 24 hours before preparation. Cucumbers can be canned whole (they will be crunchy), for sandwiches (cut into strips), or for salads (cut into rounds). The latter two options hardly allow you to achieve the desired crunch, but they ensure convenient use of the preserves.
Add a sprig of fresh, pre-washed dill to each jar. Then add peppercorns and garlic. If desired, the recipe can be supplemented with 1 tsp. mustard seeds and some finely chopped onion. If you like spicy dishes, add 1 tsp. crushed dried red pepper.
Next prepare the brine. It’s better to take white vinegar—about 2 cups. Pour it into a saucepan and add a quarter cup of water and salt. Bring the mixture to a boil, and turn off the heat immediately. Meanwhile, pack the cucumbers into the jars, pour in the solution, leaving 1 cm to the lid. Seal the jars and place them in the autoclave. Sterilization time—no more than 5 minutes for 1 L jars and no more than 10 minutes for 3 L jars, otherwise the crunch will be lost.
Recipe for Canning Zucchini in an Autoclave
Modern vegetable canning recipes allow you to prepare such a classic but beloved preserve as zucchini caviar. For it you need:
- zucchini – 2 kg;
- sweet pepper – 500 g;
- onion – 500 g;
- carrot – 1 kg;
- sunflower oil – 0.5 L;
- sugar – 50 g;
- salt – 75 g;
- ready-made tomato paste – 150 g.
Peel the zucchini and cut into approximately 2 cm cubes. Finely chop the onion, and grate or julienne the pepper and carrot. It’s better to lightly fry the pepper, carrot, and onion in sunflower oil. A little later add the zucchini, as well as tomato paste, salt, and sugar. Stew the vegetables until done, preferably over low heat. The finished product should be puréed—for example, using a blender. Portion the resulting caviar into 0.5 L jars and seal. Sterilization time—10 minutes
Recipes for Carrot Preserves in an Autoclave
Recipes are also available for autoclave preserves where one of the main ingredients is carrot. For example, to prepare carrots with green beans you need:
- carrot – 500 g;
- green beans – 1 kg;
- bay leaf – to taste;
- onion – 200 g;
- tomatoes – 700 g;
- sunflower oil – 200 g;
- salt – 3 tsp.;
- sugar – 2 tsp.
Trim the ends of the beans and cut them in half. Cut 200 g of carrot into strips, and grate the remaining 300 g. Layer the beans with the julienned carrot in the jars, add bay leaf.
Prepare the sauce. Chop the onion and, together with the grated carrot, fry in sunflower oil until golden. Add tomatoes cut into small pieces. Pour water into the pan so that it covers the ingredients, and stew for 5 minutes. Pour the finished sauce into the jars. Then seal the containers and sterilize in the autoclave for 10 minutes.

Carrot Salad in an Autoclave
Another autoclave preserve recipe using carrots requires the following ingredients:
- carrot – 1 kg;
- onion and cabbage – 1 kg each;
- sweet pepper – 500 g;
- water – 1 L;
- 9% vinegar – 1 cup;
- sugar – 250 g;
- salt – 2 tbsp.;
- bay leaf – 4 pcs.;
- pepper – 6 peppercorns.
Grate the carrot on a coarse grater, shred the cabbage, peel the onion and cut in halves. Remove the seeds from the pepper, wash, and cut into strips. Prepare the marinade separately: add vinegar, salt, pepper, and sugar to the water, as well as bay leaf, bring to a boil, and simmer for 10 minutes. Place layers of cabbage, carrot, onion, and pepper in the jar, pour the marinade on top, leaving 1.5 cm to the lid. Then seal the containers and sterilize in the autoclave for 10 minutes.
At home, you can use any recipes for cooking vegetables in an autoclave and get delicious and healthy preserves without preservatives as a result. To have this opportunity, you should buy a high-quality autoclave made in industrial conditions. For large-scale production, our company offers a series of industrial autoclaves.
Our company offers proven models that are distinguished by safety, reliability, and ease of operation. Buy an autoclave, and canning will turn from a routine into a pleasant and quick process.
Read also:
- Eggplants in an Autoclave
- Tomatoes in an Autoclave
- Mushrooms in an Autoclave
- Lecho in an Autoclave
- Solyanka in an Autoclave


